
How to get rid of mould
DIY TIPS FOR GETTING RID OF MOULD:
Getting rid of mould in your home or your commercial premises can be a little tricky, cleaning and removing mould can also be laborious and time consuming. If the mould contamination that you have is not too bad, then you may want to tackle the cleaning yourself however if you have a serious mould infestation then we recommend you call in the mould remediation professionals.
Hopefully the few tips that we provide here will help you with a safe, successful outcome for your mould removal project. Stay safe, take your time and be patient as mould removal can be a little tedious and labour intensive.
Step 1 – Safety first when cleaning mould.
Let’s not forget that mould is hazardous, this is why we are removing it in the first place, the other danger that we need to consider is the chemicals that we use to treat and remove the mould, these can often be harmful as well, so let’s take some safety measures.
- Ventilate the room where the mould is, if possible close all doors leading from the mould affected room and open the window, this will not only ventilate the room it will encourage any air borne mould spores to escape the room via the open window. Fresh air into the room will also dilute the mould contamination.
- Often mould can be up high on the ceiling or the cornice, if this is the case make sure you have a good strong, safe ladder to easily reach the mould contaminated area. If you are not confident using the ladder, have somebody to assist you.
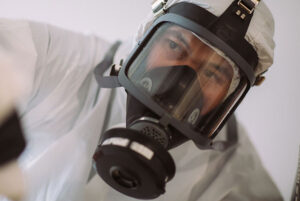
- PPE – Invest in a Tyvek suit these are not expensive, and it will protect both you and your clothing, you will also need a P2 mask (again not expensive) and also you will need nitrile gloves, make sure you double glove for additional protection. All of these items can be easily purchased from your local hardware store.
- Have a garbage bag ready to put your PPE into once you have completed your mould cleaning, remove your PPE in the contaminated room or area immediately after use, do not walk through the rest of the property wearing your PPE.
- Don’t allow anybody else into the mould affected room or area until long after you have completed the mould cleaning process.
Now that you have some safety measures in place you are ready to start the mould cleaning process.
Step 2 – Hepa vacuuming the mould spores.
With professional mould remediation Hepa vacuuming is always the first step in the cleaning process, this will assist with removing both viable and non-viable mould spores. When Hepa vacuuming we recommend vacuuming the entire mould affected room or mould affected area, starting at the least affected area working your way into the worst, most affected area.
We cannot stress this enough; you must use a certified H CLASS Hepa vacuum to vacuum mould spores, PLEASE do not use a regular vacuum cleaner to vacuum mould. If you cannot hire, buy or obtain a certified H CLASS Hepa vacuum to vacuum the mould PLEASE SKIP THIS PROCESS.
- Never use a regular vacuum cleaner to vacuum mould.
- You MUST ALWAYS use a certified H CLASS Hepa vacuum to vacuum mould spores.
- If you do not have a certified H CLASS Hepa vac available, please SKIP THIS PROCESS.

Step 3 – Surfactant mould cleaning.
A surfactant cleaner is a detergent that activates the mould contamination or dirt on the surface of the material that it is on and allows for effective removal of that contamination. A good example of a surfactant cleaning would be dishwashing liquid, yes, we recommend you clean your mould with dishwashing liquid as your first cleaning step.
By using a surfactant cleaner, you will be removing a large portion of the mould contamination; by physically removing the bulk of the contaminated load you will enable to anti-bacterial chemicals and the anti-bacterial cleaning process to be far more effective with killing the mould itself. The cleaner the surface the better the chemicals that we will use to kill the mould will work!
When cleaning mould you should NEVER spray a chemical of any kind directly onto the visible mould itself this can trigger activation of the mould spores, always have the chemical or cleaning agent pre-mixed in a bucket or apply the chemical directly to your micro-fiber cloth and damp wipe the visible mould.
Always use micro-fiber cloths to clean mould, ensure to regularly rinse out the micro-fiber during the cleaning process, also make sure you have a few cloths on hand and change them out as they get too dirty. Avoid cross-contamination by wiping areas that have little or no mould contamination with a dirty cloth.
Step 4 – Anti-bacterial mould cleaning.
You read about all these home remedies and household products that may or may not effectively kill mould, personally I would not bother with any of them. For this step in the mould cleaning process, I would recommend using a specialised anti-bacterial chemical that is designed and scientifically proven to kill 99.9% of the mould contamination.
These anti-bacterial chemicals are readily available online, in some hardware stores and at all good cleaning supply outlets. You can even get botanical anti-bacterial chemicals that are a natural product and extremely safe to use.
On top of this, it is a great idea to introduce a safe botanical anti-bacterial cleaning agent into your regular household cleaning routine anyway. I highly recommend you do a little research and look into what is easily available as far as genuine high quality anti-bacterial cleaning agents go.
Apply your anti-bacterial chemical to the mould affected areas allowing dwell time for the chemical to work and then damp wipe the affected areas with micro-fiber cloths, take your time with this process and go over the areas a number of times.
Please note that anti-bacterial treatments are designed to kill the mould, they are not typically designed to remove the mould staining, so at this stage in the mould cleaning process you may still have some mould staining on the affected surface.

Step 5 – Removal of the mould staining.
At this stage in the mould cleaning process the visible surface mould should be pretty much killed and eliminated, however there may still be some mould staining on the affected surfaces. This is where you can use your bleach or some chlorine-based products to remove the last bit of mould staining that may still be present.
Please ensure that the surface is colourfast as bleaching agents can damage some surfaces, also ensure that all carpets, fabrics and any materials that may be affected by the bleaching agents are well covered up and protected.
This bleaching agent or chlorine-based chemical should easily take care of any remaining staining that may be present, simply repeat this final surface cleaning process until all the remaining mould staining is removed.
Step 6 – Cleaning & diluting the mould contaminated air.
When you have a visible mould contamination on a surface in a room, the mould contamination does not remain soley on that surface, the mould spores will become airborne and the air within that contaminated space will also be affected.
This is the mould that you can’t see, these are the dangerous mould spores that are now airborne and not visible to the naked eye. Once the physical cleaning of the visible surface mould has been completed, the issue with the invisible airborne mould needs to be addressed.
In most cases the amount of visible surface mould will have a direct relationship with the airborne mould levels, for example if there is not much visible surface mould then the airborne mould levels should be relatively low. However, it is important to note that this is a generalization and when there is trapped or hidden mould within the property this may not be the case.
Cleaning mould contaminated air can be difficult without the right specialised equipment, however if the levels of mould are not too bad and it is a DIY project then these following tips will certainly help.
- Hire a Hepa filtered air scrubber from your local hire store (these may be hard to find)
- Open up external windows to ventilate the mould affected space.
- Place a household oscillating fan at the window blowing air out.
- Place an oscillating fan at another window and turn it around so it will draw air in.
By expelling the contaminated air from the mould affected room and drawing clean fresh air back into that same room you will be diluting the mould levels in the air, the more you can continue this process the cleaner the air in the mould contaminated room will be.

Step 7 – Drying out the mould affected room.
Mould requires moisture and food to form and to survive, therefore at some stage there has been increased moisture in the mould affected room or space to initiate the original mould growth. Unless the moisture is removed from the affected room or space then there is a high chance that the mould growth will return.
If the weather has been warm and dry during the previous air exchange process, then this removal of the wet air from the affected room will certainly help with the drying process. However, this will most likely not be enough and you may need to hire a dehumidifier to place in the room for around 7 days to dry it out.
From a DIY project perspective there is not much more you can do in regard to the cleaning and drying process. Your room should now be clean, mould free and ready to re-occupy.
Step 8 – Preventing to mould from returning.
This is one of the most important steps in the overall mould remediation process, unless you can rectify what has caused the moisture issue that has initiated the mould growth then the mould will simply return at some stage down the track.
For example, if the mould growth started due to water ingress via the roof due to a broken roof tile, then you need to replace that roof tile, if there was water ingress due to blocked gutters then you need to unblock your gutters and so on.
It is vital to identify what has caused the water ingress or the increased moisture levels that has initiated the mould growth, and you need to have the issue rectified. In some cases, you may need to have a building inspection on your property to identify the building issue or issues that may be causing the moisture problems.
When do I need to call in the pros for mould remediation.
As you can see there is quite a lot to mould cleaning and mould remediation and there is also a lot at stake as mould can be harmful to your health and to the health of all the occupants of the mould affected property.
Proper mould remediation can be tedious, time consuming and complex, we recommend that unless your mould issue is only very minor that you at least have a professional mould assessment done on your property by a IICRC certified mould remediation technician.
Having a professional mould assessment done will at least give you a better understanding of the mould issue that you have at your property. A professional mould remediation technician can also best advise you on your next course of action to take to remediate you mould issue.

Why choose Flood Fixers for mould cleaning in Adelaide.
Flood Fixers have been delivering professional mould cleaning services in Adelaide for many years. Our team are highly trained and are IICRC certified for mould remediation in Adelaide.
Our dedicated team take an uncompromising approach to mould remediation in Adelaide and provide safe, clean properties for our valued customers to occupy. Mould remediation can be a laborious and complex job, and it can take commitment and expertise to deliver a successful outcome, our team of certified mould remediation technicians are dedicated to delivering exceptional mould cleaning results for our customers in Adelaide.